The Best Fluffy Pancakes recipe you will fall in love with. Full of tips and tricks to help you make the best pancakes.
There’s a category of dinner that sounds too simple to be exciting but ends up being the thing you make on repeat for months.
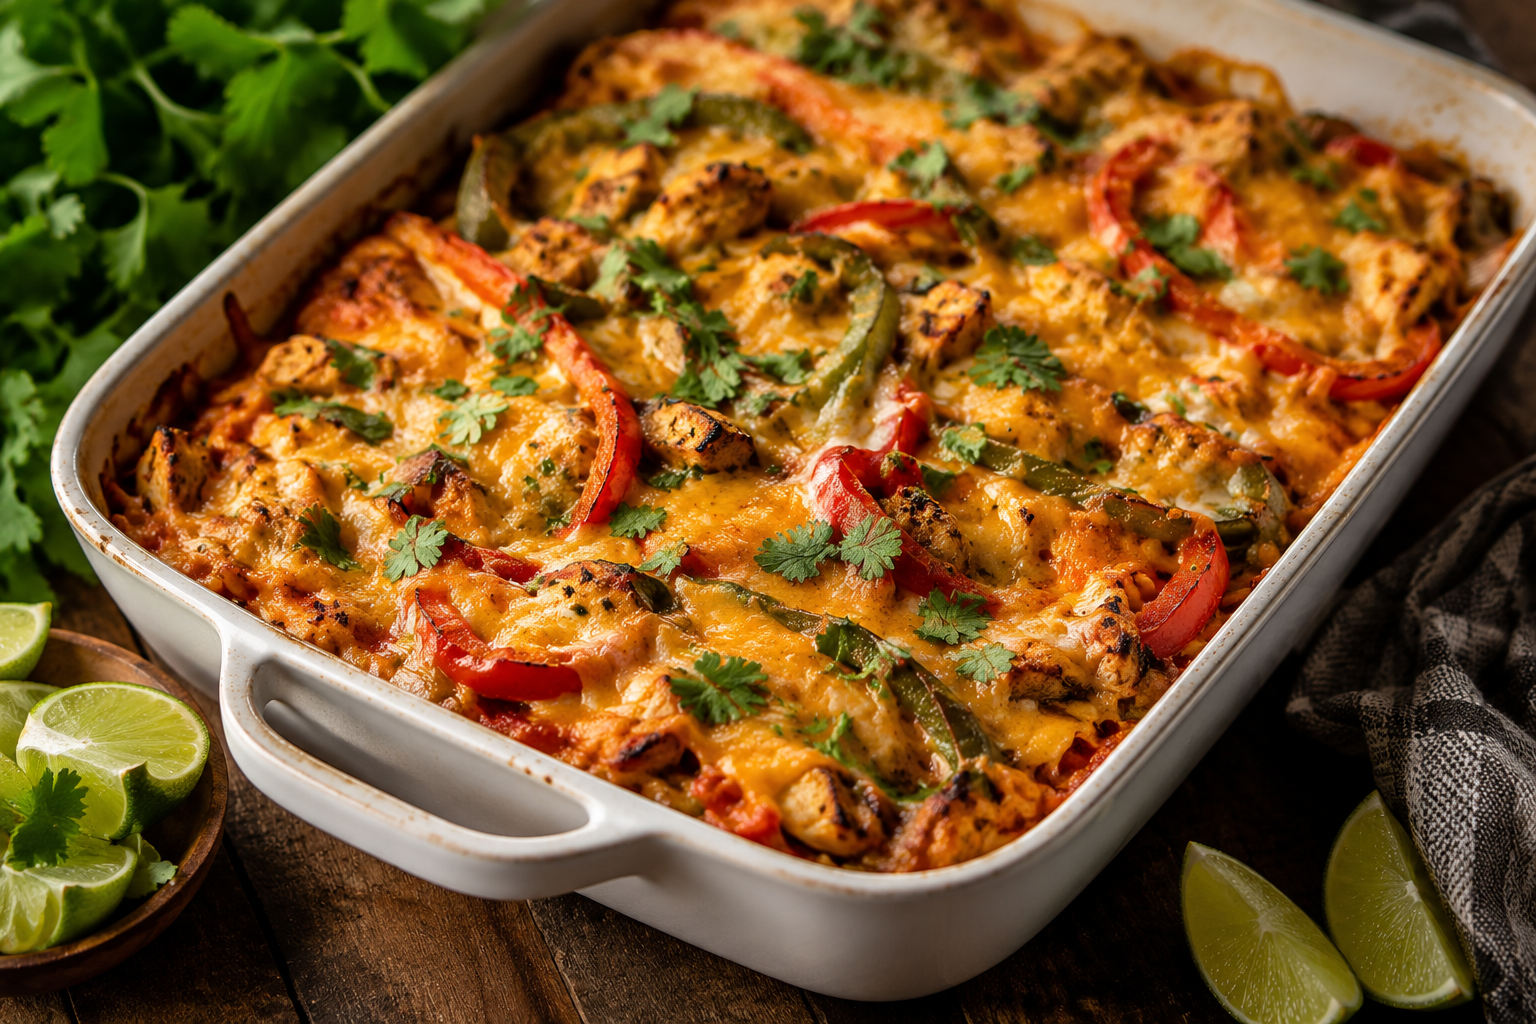
Chicken fajita casserole is exactly that.
All the flavors you love from a restaurant fajita – the smoky seasoned chicken, the sweet caramelized peppers and onions, the melted cheese pull – baked together in one dish instead of assembled at the table with twelve small bowls and a stack of warm tortillas. It’s easier to make, easier to clean up, and somehow just as satisfying.
This fajita chicken casserole recipe works for weeknights when the goal is dinner on the table in under an hour with minimal effort. It also works for meal prepping, feeding a crowd, or those nights when you want something that feels a little more special than a regular weeknight meal without actually requiring more skill to pull off.
Why This Recipe Works
Most casseroles fall into one of two traps. Either they’re so simple they’re boring, or they’re so layered and complicated they defeat the purpose of making a casserole in the first place.
This chicken fajita casserole recipe lands in the middle. The layering is simple and intentional – seasoned chicken on the bottom, peppers and onions through the middle, cheese on top. Everything bakes together so the flavors meld rather than sitting separately on the plate. The result tastes like something that took more effort than it did, which is the quiet goal of every good weeknight recipe.
It’s also naturally flexible. Low-carb or keto? Skip the tortilla strips. Want more heat? Add jalapeños or extra cayenne. Need it dairy-free? There are good melting cheese alternatives that work just as well here. The base recipe is solid enough to take those adjustments without falling apart.
Ingredients You Need
Here’s what goes into the casserole. Nothing unusual, nothing that requires a special trip anywhere.
For the chicken and seasoning:
- 2 lbs boneless, skinless chicken breasts or thighs
- 1 tablespoon olive oil
- 1 teaspoon chili powder
- 1 teaspoon cumin
- 1 teaspoon smoked paprika
- 1/2 teaspoon garlic powder
- 1/2 teaspoon onion powder
- 1/2 teaspoon salt
- 1/4 teaspoon black pepper
- Pinch of cayenne (optional, for heat)
For the casserole:
- 3 bell peppers, sliced thin (use a mix of red, yellow, and green for color)
- 1 large yellow onion, sliced thin
- 1 can (10oz) diced tomatoes with green chiles (Rotel), drained
- 1 cup sour cream
- 1.5 cups shredded Mexican blend cheese or cheddar, divided
- Small flour or corn tortillas, cut into strips (optional, for a layered version)
For serving:
- Fresh cilantro
- Lime wedges
- Avocado or guacamole
- Extra sour cream
How to Shred Chicken Breast – The Method That Makes This Recipe
Most chicken fajita casserole recipes call for shredded chicken, and a lot of people either skip that step or spend ten frustrating minutes attacking a chicken breast with two forks.
Here’s what actually works.
The two-fork method is the classic and it’s genuinely fine for small batches. Place your cooked chicken breast on a cutting board or in a bowl, hold one fork steady in the center, and use the second fork to pull the meat apart in the direction of the grain – following the natural lines of the muscle fiber. Working with the grain gives you clean, long shreds. Working against it gives you chunks.
The stand mixer method is the best way to shred chicken if you have a lot of it or don’t want to spend time on it. Place warm cooked chicken in the bowl of a stand mixer fitted with the paddle attachment. Run it on medium-low speed for 20 to 30 seconds. The paddle does all the work and produces evenly shredded chicken in under a minute. This is particularly useful for a casserole recipe where you’re shredding two full pounds at once.
The hand mixer method works the same way as the stand mixer – place chicken in a deep bowl, press the beaters into it, and run on low speed. A little messier than the stand mixer but equally fast.
Can you shred chicken in a food processor? Yes, with a caveat. Cut the cooked chicken into rough chunks first, add them to the food processor in small batches, and use the plastic dough blade rather than the metal blade if you have one. Pulse five to six times rather than running continuously – you want shreds, not a paste. As Jessica Gavin explains in her guide to shredding chicken six ways, the food processor method produces finer, more uniform pieces than forks but can tip into mush quickly if you overprocess it. Short pulses, small batches, and stop early.
The easiest way to shred chicken for this specific recipe: cook the chicken breasts in a pot of simmering seasoned broth for 15 to 18 minutes until cooked through, then shred immediately while still warm. Warm chicken shreds significantly faster and more cleanly than cold chicken – the muscle fibers are still relaxed and pull apart easily. Cold chicken from the fridge resists shredding and takes twice as long.
One shortcut worth knowing: a rotisserie chicken from the grocery store already gives you perfectly tender, pull-apart chicken. Strip the meat from the bones, toss it with the fajita seasoning, and you’ve cut 20 minutes off the recipe without compromising the result.
Chicken Fajita Casserole Recipe – Step by Step
Serves: 6 Prep time: 15 minutes Cook time: 35 minutes Total time: About 50 minutes
Step 1: Cook and season the chicken
If starting with raw chicken breasts, bring a pot of salted water or chicken broth to a gentle simmer. Add the chicken breasts, cover, and cook for 15 to 18 minutes until the internal temperature reaches 165°F. Remove, let rest five minutes, then shred using whichever method works best for you.
Toss the shredded chicken with the olive oil and all the spices – chili powder, cumin, smoked paprika, garlic powder, onion powder, salt, pepper, and cayenne if using. Make sure every strand is coated. This is where the fajita flavor comes from, so don’t rush through the seasoning step.
Step 2: Cook the peppers and onions
Heat a large skillet over medium-high heat with a splash of olive oil. Add the sliced bell peppers and onion in a single layer and leave them undisturbed for two to three minutes before stirring. You want them to get some char and color – not just steam. Stir, cook another two minutes, then remove from heat.
This step takes about eight minutes total and makes a real difference in flavor. Soft, lightly charred peppers taste like fajitas. Pale, steamed peppers taste like nothing.
Step 3: Make the base mixture
In a large bowl, combine the seasoned shredded chicken, cooked peppers and onions, drained diced tomatoes with green chiles, sour cream, and half the shredded cheese. Mix everything together until evenly combined.
Step 4: Assemble the casserole
Preheat your oven to 375°F. Lightly grease a 9×13 inch baking dish with cooking spray or a thin layer of olive oil.
If using tortilla strips, lay half of them across the bottom of the dish in a single layer. Spread the chicken and pepper mixture evenly over the top. If using the second half of tortilla strips, scatter them over the filling. Finish with the remaining shredded cheese spread evenly across the top.
If skipping the tortillas entirely (for a lower-carb version), just spread the filling directly in the dish and top with cheese.
Step 5: Bake
Cover the dish with foil and bake at 375°F for 20 minutes. Remove the foil and bake for another 10 to 15 minutes until the cheese is fully melted, bubbly, and starting to turn golden at the edges.
Step 6: Rest and serve
Let the casserole sit for five minutes before serving. This helps everything hold together when you scoop it rather than collapsing into a pile. Serve with fresh cilantro, lime wedges, avocado, and sour cream on the side.
Variations Worth Trying
Black bean and corn version – Stir a drained can of black beans and half a cup of frozen corn into the filling mixture before baking. Adds fiber, substance, and stretches the casserole to feed more people without any extra work.
Creamy version – Replace the sour cream with one block of softened cream cheese mixed with a splash of chicken broth. The result is richer, slightly denser, and holds together more firmly when served – good for anyone who wants more of a layered, sliceable casserole rather than a scoopable one.
Spicy version – Add one or two diced jalapeños to the pepper and onion cook, and swap the diced tomatoes with green chiles for a spicier salsa verde. Use pepper jack instead of Mexican blend cheese on top.
Low-carb version – Skip the tortilla strips entirely and serve the casserole over cauliflower rice instead. All the fajita flavor with none of the extra carbohydrates from the tortillas.
Make-ahead version – Assemble the entire casserole up to 24 hours ahead, cover tightly with foil, and refrigerate. When ready to bake, add five to ten extra minutes to the covered baking time since it’s going in cold.
What to Serve Alongside
The casserole is a complete meal on its own, but a few simple sides round it out without adding much work.
A simple green salad with lime vinaigrette – just olive oil, lime juice, a pinch of cumin, salt, and pepper – takes five minutes and adds freshness that cuts through the richness of the cheese and sour cream.
Cilantro lime rice makes the meal more substantial if you’re feeding people with bigger appetites. Cook white rice, stir in lime juice, fresh cilantro, and a pinch of salt. That’s the recipe.
Warm flour or corn tortillas on the side let people scoop portions of the casserole into a wrap if they want it that way – a nice option when you’re feeding a mix of people with different preferences at the table.
Storage and Reheating
This casserole keeps well and actually reheats better than most, which makes it a solid meal-prep option.
Refrigerator: Store leftovers in an airtight container for up to four days. The flavors continue to develop overnight and the casserole is often better the next day than it was fresh.
Freezer: Let the casserole cool completely, then portion into freezer-safe containers. Freeze for up to three months. Thaw overnight in the refrigerator before reheating.
Reheating: Cover with foil and reheat in a 350°F oven for 15 to 20 minutes until warmed through. For single portions, the microwave works fine – cover loosely and heat in 90-second intervals, stirring between each.
Frequently Asked Questions
Can I use chicken thighs instead of chicken breasts?
Yes, and many people prefer them for this recipe. Chicken thighs have more fat and stay juicier through the baking process, which means less risk of the casserole turning dry. The shredding process is the same – cook, rest, shred while warm. Boneless skinless thighs work best.
What is the best way to shred chicken for a casserole?
For large batches like this recipe, the stand mixer method is the fastest and most consistent. Place warm cooked chicken in the stand mixer bowl with the paddle attachment and run on medium-low for 20 to 30 seconds. For smaller amounts or if you don’t have a stand mixer, two forks pulling along the grain of the meat work well. The key regardless of method: shred the chicken while it’s still warm, not cold.
Can you shred chicken in a food processor?
Yes – cut the cooked chicken into chunks first, work in small batches, and pulse five to six times rather than running the processor continuously. Use the plastic dough blade if available. Stop before it turns completely smooth – you want shreds with some texture, not a paste.
Is this recipe gluten-free?
It can be. The chicken, peppers, onions, cheese, sour cream, and spices are all naturally gluten-free. The main thing to check is the tortilla strips – use certified gluten-free corn tortillas if needed, or skip them entirely. Also check the diced tomatoes with green chiles label since some brands add thickeners that contain gluten.
Can I make this casserole ahead of time?
Yes. Assemble the entire dish up to 24 hours in advance, cover tightly, and refrigerate. Bake directly from the fridge, adding five to ten extra minutes to the covered portion of the baking time. It’s a genuinely useful make-ahead option for dinner parties or busy weeknights.
How do I keep the casserole from being watery?
Two things cause a watery casserole: undrained tomatoes and vegetables that weren’t cooked before going in. Drain the canned tomatoes well. Cook the peppers and onions in a hot pan until the moisture evaporates before adding them to the filling. Both steps together prevent any excess liquid from pooling in the bottom of the dish during baking.
What cheese works best?
A Mexican blend (usually a mix of cheddar, Monterey Jack, queso quesadilla, and asadero) melts the most evenly and has the right flavor profile for this dish. Straight cheddar works well too. Pepper jack adds heat. Avoid low-moisture part-skim mozzarella – it melts but doesn’t have enough flavor to carry the dish.
What cheese works best? A Mexican blend (usually a mix of cheddar, Monterey Jack, queso quesadilla, and asadero) melts the most evenly and has the right flavor profile for this dish. Straight cheddar works well too. Pepper jack adds heat. Avoid low-moisture part-skim mozzarella – it melts but doesn’t have enough flavor to carry the dish.